Monday, January 20, 2014

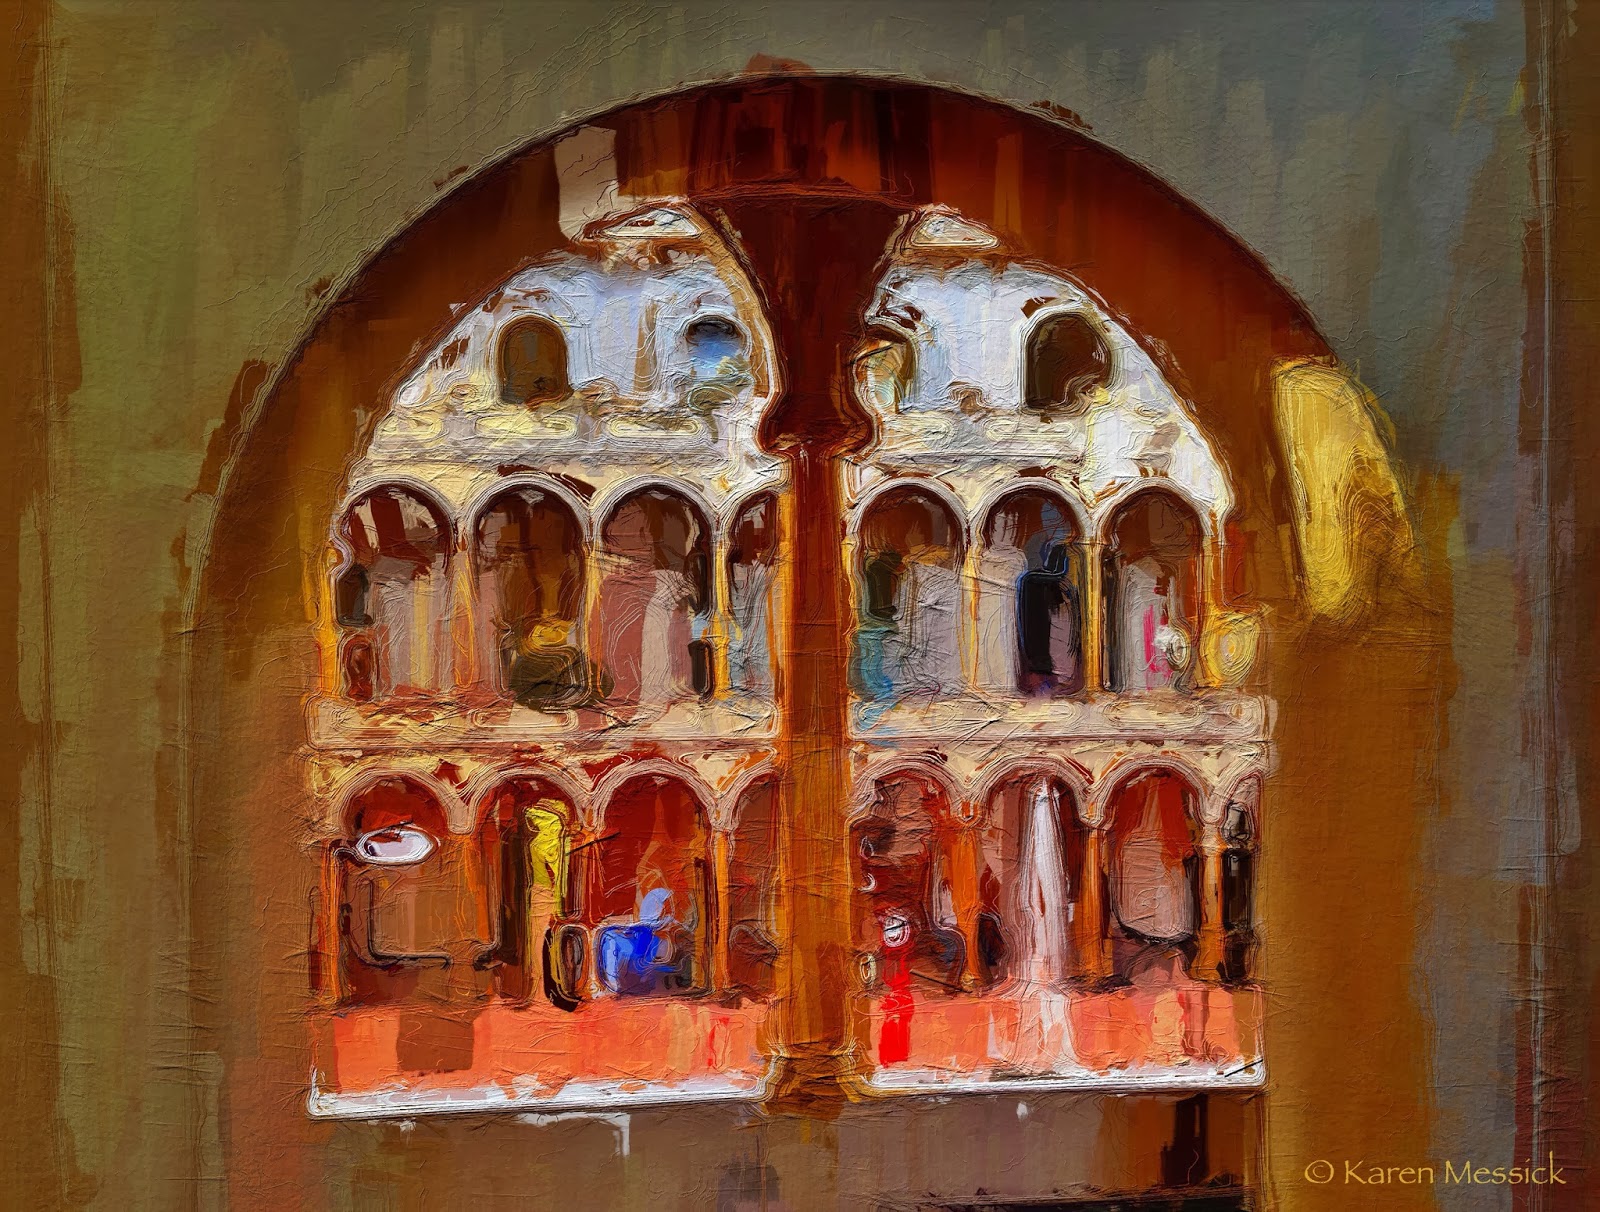
National Building Museum ~ BracketMode~ ProHDR~Mextures~ Glaze~Snapseed

Captured Hipstamatic Jane Lens Inas 1969: Processed: Snapseed-HDRScape and Retrolux: Glaze
Sunday, after working for four hours with a group of eager to learn iPhoneographers, I made a few shots of my own before leaving the National Building Museum in Washington, DC. It is a fabulous building with a lot of historical relevance. The Grand Hall is best photographed in the morning so in the late afternoon light I looked for a few intimate and slightly different shots with my iPhone.
My next Getting Started workshop in iPhone photography is March 8.
(February class has 1 spot open)
If you have already taken the Getting Started session my next day long iPhone Photography Session "Working with APPS in Depth" sponsored by Capital Photography Center is scheduled for is May 4th in Washington, DC.
Capture: BracketMode Processed: ProHDR: Glaze: ImageBlender: Mextures
Capture: BracketMode Processed: ProHDR: Snapseed: Glaze: ImageBlender: Leonardo
Capture: BracketMode Processed: ProHDR: Snapseed: Mextures: Glaze: ImageBlender: Leonardo


Capture: BracketMode Processed: ProHDR: Snapseed: Glaze: ImageBlender: Leonardo

Sunday, January 5, 2014

Fells Point in Black and White Captured~ Hipstamatic, Camera+, PaintedFX, Snapseed


Captured: Camera+ Processed: PaintedFX for texture, Snapseed, and ImageBlender
(The rays were naturally occurring shooting into the sun)
Yesterday I joined an iPhone Meet-up in Fells Point. I have not participated in a meet up before, and when it came through my e-mail, I thought, why not, my schedule was open,  Fells Point is close, so I responded yes over two weeks ago. Then, the deep freeze and snow arrived! I decided to go anyway...and test out the iPhone under extreme cold. (it was 19 degrees)
What I found: I tried working with Hipstamatic Oggle but the user interface would not let me access the shooting menu, so I went back to Hipstamatic Classic, which makes shooting so easy with the big screen tap and fire feature. I also used Camera+ to shoot as well as BracketMode which both worked fine. As usual, on a photo shoot people split up and find their own shots, the same for me...it was cool not being a leader for a change! The Meet-up organizer's  iPhone kept auto shutting down while shooting in the cold. He had only a thin case, while my Mophie JuicePak Plus encased iPhone kept on firing. I think the JuicePak added some insulation and warmth from the battery pac charging. I used my Isotoner Smartouch gloves, but found that it was still better shooting with my ungloved hand. I think it was so cold I was not transmitting enough heat to the Smartouch pad! When not shooting I put the iPhone into a pocket in my ski jacket. I have a few color shots I made which, I will process and be in another post.
My next iPhone workshop is January 19, inside at the National Building Museum.
Only three spaces left!
Capture: Camera+ Processed: Snapseed

Capture: Hipstamatic Processed: Snapseed, Rays

Capture: Hipstamatic, Jane Lens, Inas 1969 Film Processed: Snapseed
Capture: Camera+ (7 shots stitched in AutoStitch) Processed: AutoStitch, Snapseed The is the Facade of the building where the series "Homicide" was made.

Sunday, December 22, 2013

Union Station Last iPhone Workshop of 2013


Capture: Camera+ Processed: Glaze, Leonardo, Frame -Crop'n'Frame, Text: Title FX
The iPhone just keeps getting better and the apps for creating images are amazing. Yesterday I conducted my last iPhone workshop for 2013. Looking back over the year, I worked with 145 iPhone Photography students, either participating in workshops sponsored by Capital Photography Center, Horizon Photography Workshops, Johns Hopkins University Odyssey Program or through private tutoring: AMAZING! In addition I made iPhone presentations to members of local Camera Clubs and Art Collectives. I am thankful for all the students who attended my workshop sessions! I will continue to work with Capital Photography Center and Horizon Photography Workshops in 2014 so if you are interested in a workshop keep you eyes on their site as offerings are posted this year. My next iPhone workshop will be fun at The National Building Museum on January 19, 2014. I love Washington, DC and the architecture in the city is just beautiful. The Natonal Building Museum is grand, if you have never been there its worth the trip! If you don't want to miss one of my updates the scan the QR code on the top right of my blog and join my e-mail list.
Captured: BracketMode Processed: ProHDR, Portrait Painter, ImageBlender
Yesterday, Union Station was dressed for Christmas! People were bustling through and the temperature was 70! It was a fun day! Thanks to the folks at Le Pain Quotidien for hosting the meeting part of our workshop! I was asked by a student; When do you choose to shoot with one app over another?" I made this shot below to demonstrate why I would choose a Hipsta Combo for food as an example. Hispta has a great "Foodie Snap Pac" combo of Loftus lens and DC film that is made for food photography. Knowing what apps to choose for your subject is very important to the final result. I love Hipstamatic for shooting. Now Camera+ has added a feature to shoot square with all the same great features it has always had.  Hipstamatic and Camera+ get my vote for the best shooting apps this year! My favorite processing app of 2013 has to be GLAZE! It is a fabulous painterly app with lots of unique creative customizable effects! Make lots of pictures! Have fun and share!
Wishing everyone a very Happy Holiday and a Super new year! Hope to see you in 2014!
Capture: Hipstamatic Processing: None

Wednesday, November 13, 2013

Hipstamatic Oggl ~ Winter at the Beach


Watts Lens and BlacKeys Supergrain Film
This is my last week at the beach before closing the house for the winter. It was very cold last night as a Canadian blast of cold air came through. The beach in winter, and it does feel like winter, is ghost like. People abandon it and return it to the wind, the birds and the sea. As the WWII watch towers now stand guard over the abandoned picnic tables, winter is coming on. All these images were shot using the Hipstamatic Oggl app. The coolest thing about Oggl is the ability to control exposure and then to choose the combination of Lens and Film after the shot is made. It was a bold blue sky day when I made all these images and I like to think in Black and white on those kind of days. Processing all the images here in Oggl I chose several Lens and Film combos to achieve the results.
Watts Lens Blackeys Supergrain Film
 The dune fences give way to the wind and the sand.
Watts Lens and Rock BW-11 Film


Shells are tossed to shore and nestled into windblown sand.
Foxy Lens and BlacKeys Supergrain Film


Beach pines filter the harsh afternoon sun.
      
G2 Lens and BlacKeys Supergrain Film                                  


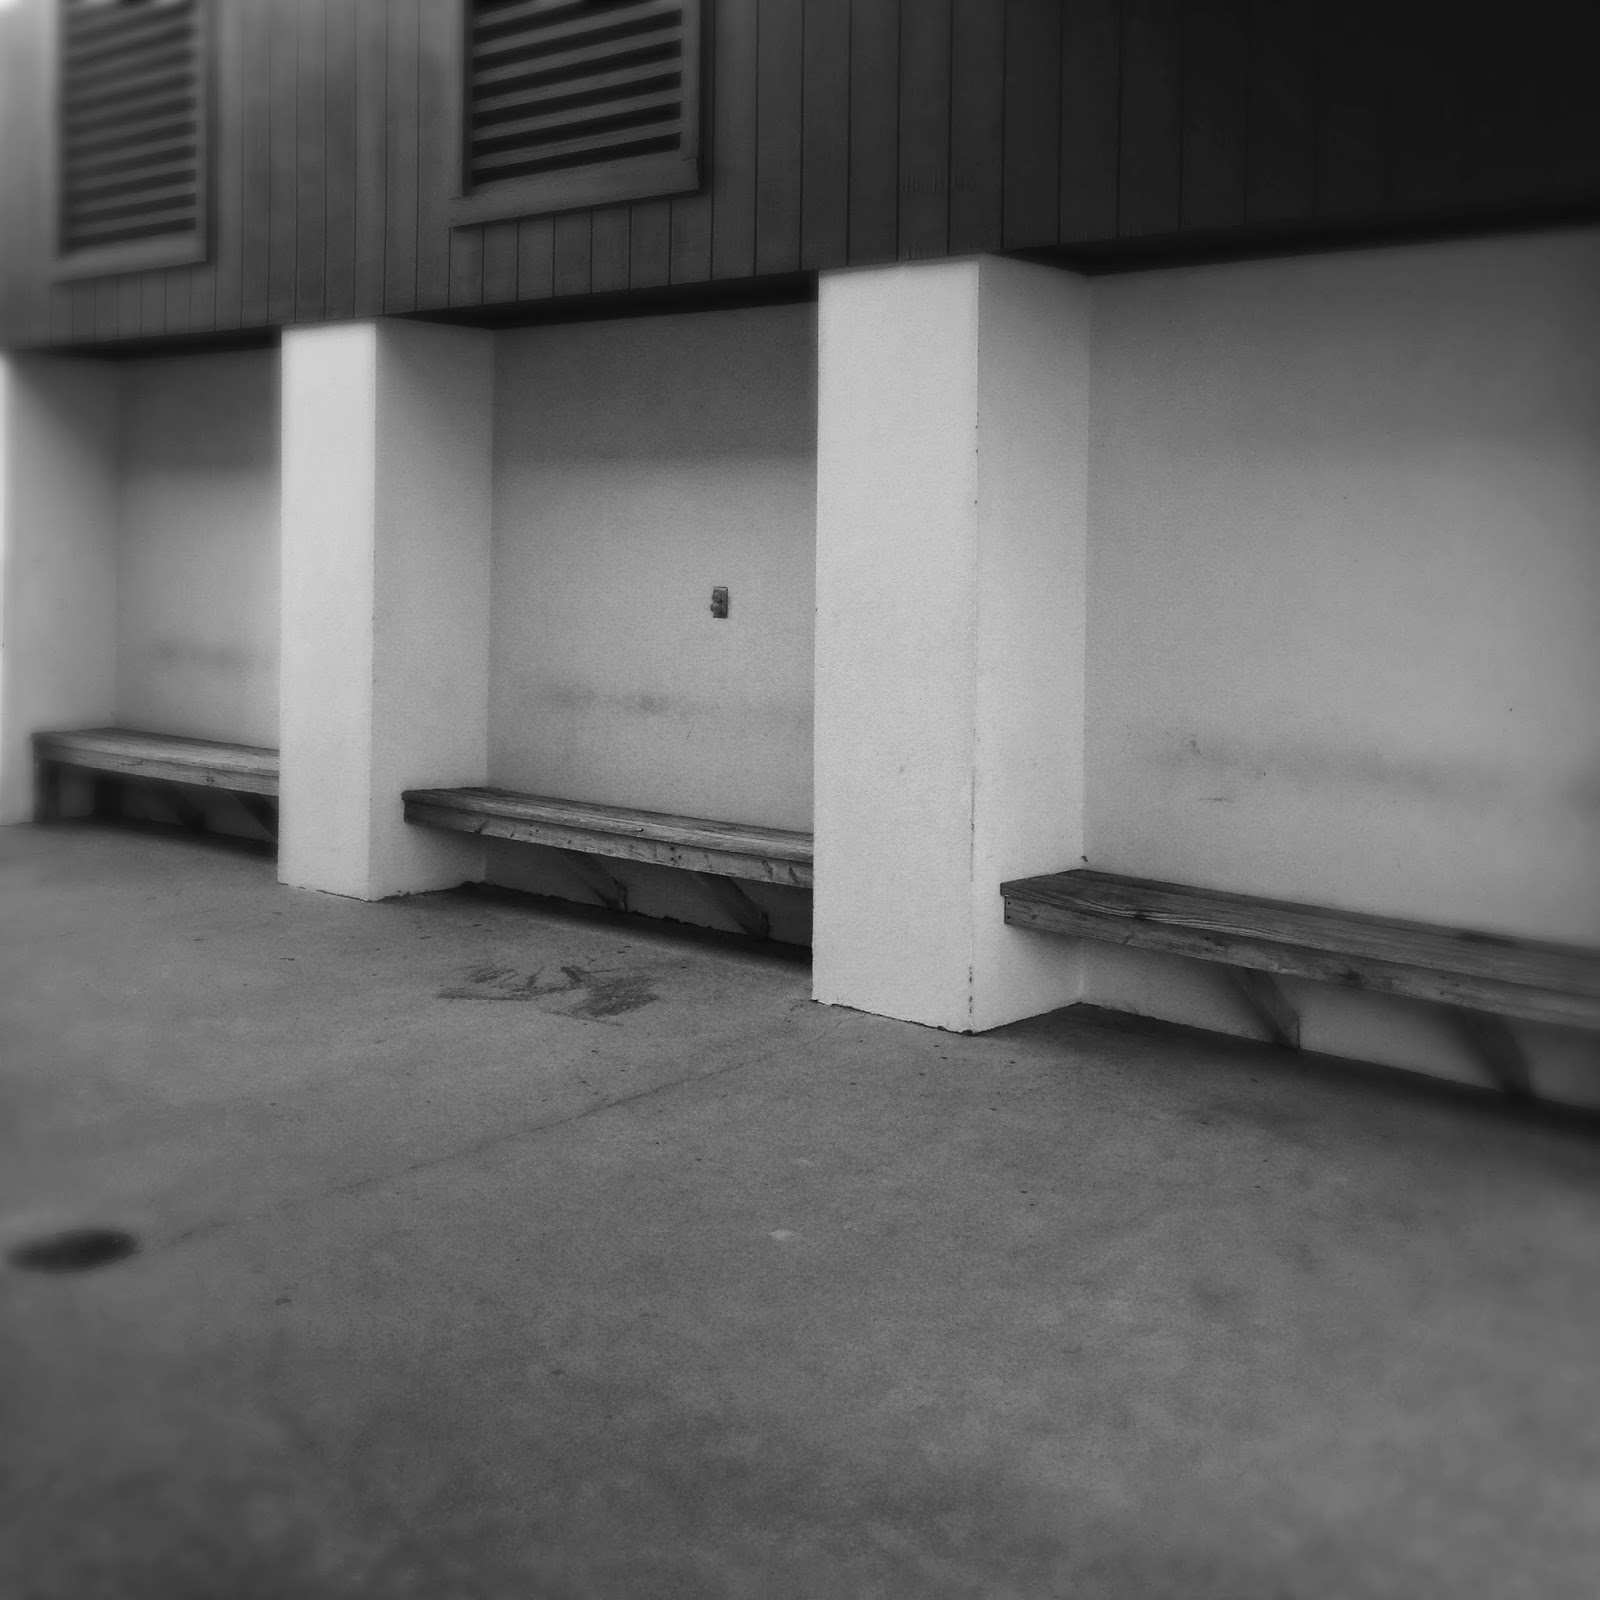
Beach grass struggles to keep rooted in the shifting windblown sands. The ice lockers are locked and the refreshment stands are shuttered. The bath house benches are empty. Winter is here!
Lucas Lens BlacKeys XF Film

Lucas Lens D-Type Plate Film       


Loftus Lens BlacKeys XF Film


Monday, November 11, 2013

Beach Pines~ You can never duplicate the exact image unless you write it all down!


This is an image I posted on Facebook over the weekend. One Facebook friend said they hoped I would write a tutorial on my blog for this processing. Well...... I can tell you what I shot it with and maybe a few steps along the way. However to duplicate the exact same image after the fact, with a process one could share, without writing down the original process, is almost impossible. I am not one to write down my processes with exacting steps. In this tutorial I have tried to recreate the image to some degree here. Hopefully these steps will be a starting point for a creative process you might want to try.

Original Image Capture: Hipstamatic Oggl ~ Lowry Lens Kodot XGrizzled Film
The reason I chose Oggl is because you can control exposure. Using the reticles in Oggl I wanted to open up the deep shady areas of the pines. I didn't care if the sky blew out because it was gray and overcast anyway. I did want a hint of horizon line from the ocean. SO controlling capture is important to me as well as processing. I knew I wanted to add textures to the sky area when I shot this image.
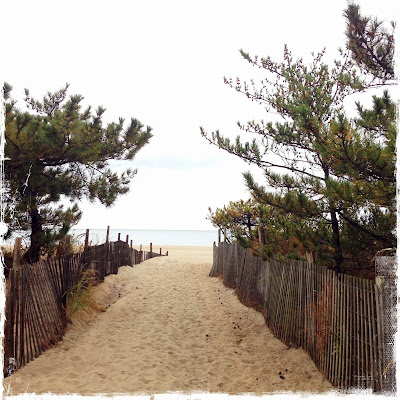
Original Capture
Processing:
A. Open the Hipstamatic image in Mextures then choose
 1. Grunge Filter Painterly
                                           Choose Blend Mode Multiply
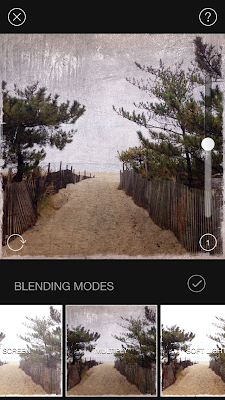
Screen shot of Mextures Grunge interface
Then Adjust texture to 50% Check and continue to add filters in Mextures.
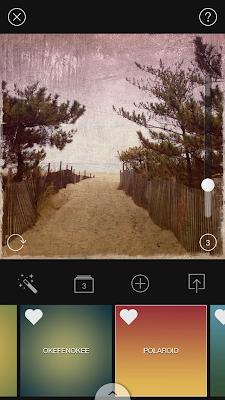
Screen shot of Mextures Vintage User interface
   2. Then add new filter in Mextures
       Landscape enhance "Vignette" at 20 %  Blend mode overlay (not shown) Check and continue  to  add filter in Mextures.
   3. Then add new filter in Mextures
          Vintage "Polaroid" at 20% Blend mode Hard Light 
Save file to Photo Library

B. Open the saved Mextures file in AutoPainter and apply Benson filter and save.
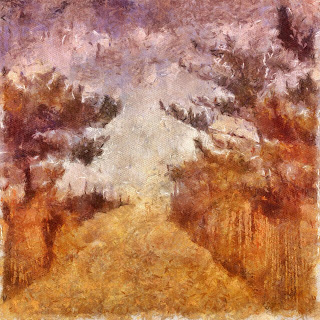
AutoPainter file

C. Open the last saved Mextures file (not the AutoPainter file) in Leonardo and apply the Clarity slider as shown in screenshot and save to Photo Library.
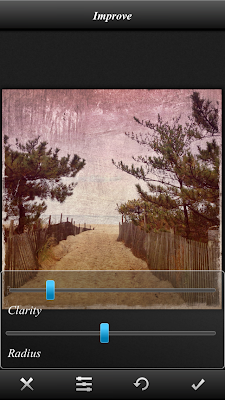
Screen shot Leonard Clarity interface
D. Open AutoPainter saved image in Snapseed and add ambience and warmth in the Tune Image Command and save file.
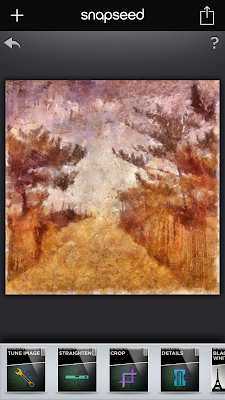
Screen shot Snapseed
E. Open Image Blender and open The last saved Mextures file from Leonardo first, with the last saved AutoPainter file from Snapseed and blend with Lighten mode at about 45% and save.
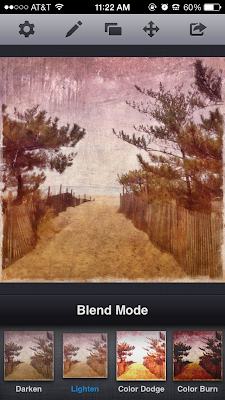
Screen shot ImageBlender interface
F. Open the saved ImageBlender file in distressed fx and use filters to adjust color save.
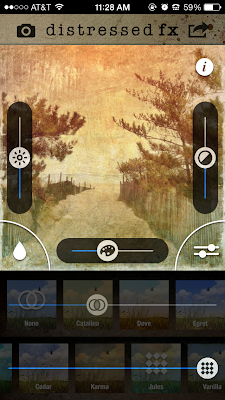
Screen shot distressed fx interface
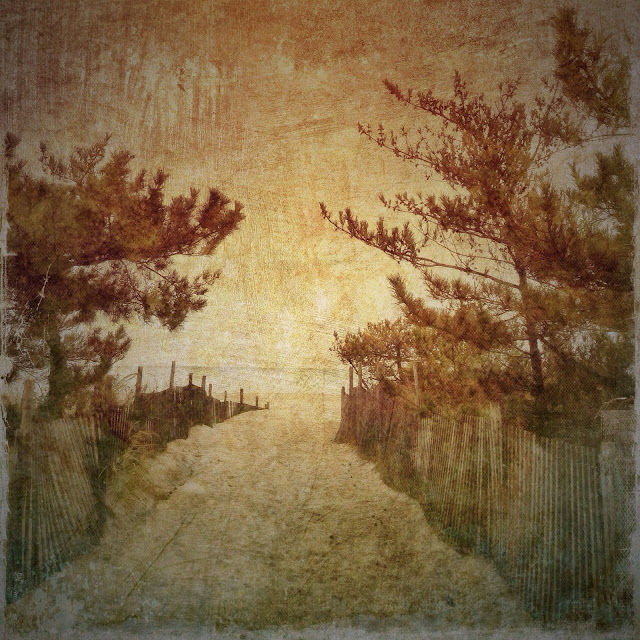
G. Lastly to the saved distressed fx file add a vignette in Mextures and save. This is close but not exact in tone and shading however, I hope the tutorial will give you some ideas for future processing of your images.
Check out my next all day iPhone Sessions in DC on November 24 sponsored by Capital Photography Center (click here for more info) and in Chestertown, Md on November 23 sponsored by The Chestertown River Arts (click here for more info on Chestertown.)
Final image


Sunday, November 3, 2013

Trees: Hipstamatic Classic: Glaze: Leonardo: ImageBlender


It has been a beautiful fall week with the trees really showing their colors. I have been gathering a collection of colorful tree images from my iPhone. While working with Glaze in workshop mode I have developed a filter that I like for trees...it reminds me of a style of painting called Pointillism made popular by Georges Seurat...and yes it is a form of Impressionism which I love so much!
I also updated to iOs7 and I definitely see a purple tint in some images. The update went well after sorting off 2000 images from my iPhone and backing up the computer...updating all the apps that needed updating, then updating to iOs7. If you are one of the 30% that have not yet updated, click here for some tips before updating.
After updating, I had to change the home screen background and found that using a burgundy background allowed me to readily see the names of my app folders, which I found hard to do with the new design of the app folders. Then I immediately followed tips on saving battery power that were published...click here for a good list. Then I started to find the new features...Click here for a list of what you can now do with the updates.
Now heres a few more trees! I love fall! I hope you have been enjoying it where ever you are!
My  next "Getting Started" in iPhone photography workshop sponsored by Capital Photography Center is November 17 in Baltimore, click here for more information.
Also I will be doing an all day iPhone photography workshop "Working with Apps in Depth" in Washington, DC on November 24. Click here for more info and registration.
And.....I will be in Chestertown, Maryland on Saturday November 23 at the Chestertown River Arts for an all day iPhone photography workshop "Working With Apps in Depth"..click here for more info and registration.


Sunday, October 27, 2013

Hipstamatic Oggl~ Now you can create an HDR with your favorite Hipsta Combo!


Image Capture: Hipstamatic Oggle Processing: Pro HDR, Glaze, Leonardo, ImageBlender
When the folks at Hipstamatic launched Hipstamatic Oggl in May of this year, I passed it by; thinking, Why would I want to pay for a subscription on an iPhone app? (It is only $9.99 a year) But now it has been through several version updates, with the most recent one on October 17 and it is packed with goodies! You can import all your existing Lenses and Films from Hipstamatic Classic, you can control exposure, you can swap filters, you can share with the Oggl community, you can import images from your camera roll and apply Hipstamatic filters and now you can create a High Dynamic Range (HDR) Hipsta image with a little creativity and a tripod mount. (If you are a classic Hipsta shooter, how many times did you wish for control over exposure? Well Oggl delivers it now.)  As far as a tripod mount: Kirk makes a cool tripod mount that fits its regular tripod plate here is a link for it: Click here: but there are others, its just really important to keep the iPhone still and in the same position when making the two bracketed images.
Here is how I created a Hipstamatic Oggl HDR image...I was playing with Oggl, with my iPhone mounted on my tripod at Longwood Gardens on Saturday. It was a bright, windy, sunny, contrasty but beautiful fall day. I wanted to capture the sky and shady areas in the landscape. So, I thought, now that you can choose an exposure point in Hipstamatic Oggl, I did and made an exposure for the sky, which of course threw the ground and shady areas into almost complete darkness. Then I made an exposure for the ground and shady areas which blew out the sky! Perfect! Now I had the two Hipstamatic images I wanted to blend together in Pro HDR by eyeApps LLC (ProHDR has not done an update for iOs7 but seems to work fine)...It worked!!! here's the proof! So now I would recommend purchasing Hipstamatic Oggl! Its Hipsta Classic on Steroids!
Here are the files I used to achieve the opening image. For both sets of image files I used Ina's 1969 film and the Jane lens.
 
Exposure made on tripod and created to capture details in the shady area, which blew out the sky.

Exposure made on tripod and created to capture the sky color, which threw the areas in the shade into darkness.
Combined image in Pro HDR
So because I could I made another image in the same way. Here is the finished "Glazed" image and the shots I used to get to the final image.
Captured for detail in the shady areas, sky blows out.
Captured for the color of the sky, shady areas go almost black.  
Combined previous two images in Pro HDR
Processed in Glaze and enhanced in Leonardo for final image.