Showing posts with label Stackables. Show all posts

Friday, September 9, 2016

Creating a Photo Series on your iPhone ~ Hipstamatic ~ Stackables


It's no secret, I love the beach and I love the app Hipstamatic for shooting in certain situations where you want a very unique look. I went for a walk on the beach late in the afternoon and loved the fading light, tide pools and the sparse amount of people enjoying the beach.
My idea was to use Hipstamatic loaded with the Fashion Pak while adding exposure using the shutter speed dial in Classic Mode, I wanted a bit of an ethereal look in my images.
The latest Hipstamatic update added an in App "Settings" menu under the Photos Icon in the lower left of the Classic screen: Tap the photos icon, then Tap Menu, Then Settings, it is a bit obscure but there.
There are new features for 1. Capture: Raw original unfiltered image in a 2x3 orientation along with the Square Filtered image, adding more complexity to the app and for, 2. Saving: as separate files or versions. You will need to make choices there in the settings based on your preference for Capture and Saving...

Hipstamatic now has a lens preview switch, a small toggle next to the shooting screen, which allows you to see what the image will look like with the selected film and lens combo. It was a big update on September 1: there are lots more updated features. This app, though adding improvements, has gone from a really cool simple to use app, to a somewhat complex to a new user app. I still enjoy shooting in classic mode, as I love the large screen feature of shutter release...though the pro mode shooting side of the app is pretty cool too!
So much for updates, back to creating the images: After I captured the images I wanted, I took the images into the Stackables app applied a texture filter and saved it as a formula in the app so I could apply the same filter with the same opacity to the series I shot.
I then finished the series by adding my name using the app Impression. So give it a try..create a series with intent, a point of view and consistency...
Check out my Getting Started iPhone workshops at Capital Photography Center in Washington, DC


Tuesday, April 7, 2015

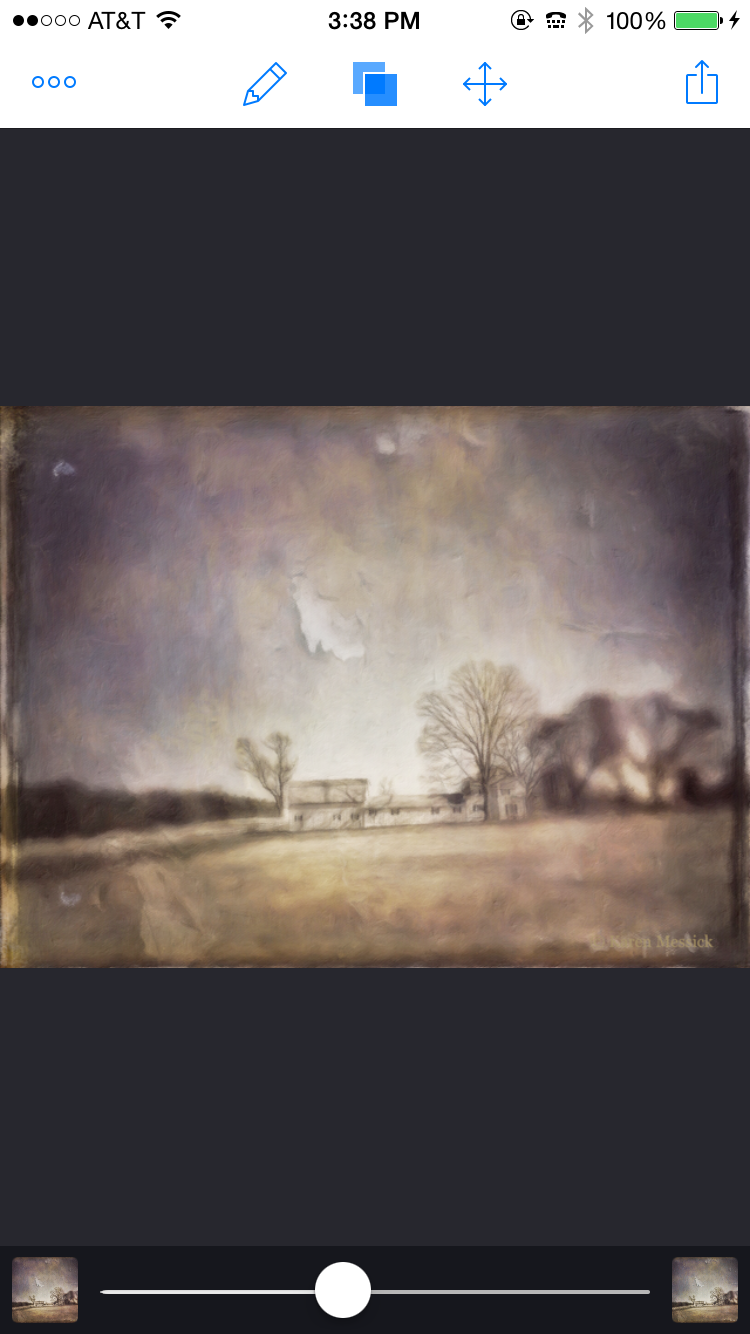
Farm Dreams ~ Camera+ ~ Stackables ~ Impresso ~ ImageBlender ~ Snapseed ~ Impression

Processed final image...Farm Dreams
Rainy day at the beach so I have some time to made good on a promise I made about writing a tutorial on my image "Farm Dreams" I posted on Facebook the other day....so here goes....
As with all images Capture is important, given subject and light. So my choice to capture the original image was with Camera+ in late afternoon light striking this side of the barn. The farm was a good way off the road and knowing that Camera+ has a zoom feature as well as an exposure and focus feature, I chose to capture the image with Camera+. When I captured it I knew that a zoomed in iPhone image would not give me the best quality for a "straight" shot, but I did not care about the quality just the capture, as I had intended to use processing applications to create a painterly look.
Image 1 original capture with a little tweaking in Snapseed.
I always run my original capture through Snapseed as a basic processing application for clarity, structure, ambience, white balance etc.....
Image 2 Processed in Stackables using the Formula feature and Tintype...
Image 3 Added texture filter Lacerations in Stackables to the Tintype filtered image and one more texture "Soft Clouds" at a very low opacity and saved to camera roll.
Image 4 Added my signature with Impression and saved to camera roll.


Image 5 This is Image 4 processed with the Impresso app...Choosing the preset "Portrait Perfect" and then adding an area of adjusted brush strength.
Settings in Impresso

Detail area selected
After making the image adjustments in Impresso I saved it to my camera roll for further editing.

Image 6 Blended with Image 5 and 4 in ImageBlender

After saving the blended image I then took the image back into Snapseed for contrast, brightness, detail and structure adjustments to arrive at the Final edited image.
Final Edited Image "Farm Dreams"
I love getting comments on Facebook from friends that see my images...and I just loved the interpretation of Carol Tharp when she wrote "Reality ripping away at your dream!" Awesome insight, tho I never wanted a farm in many ways this may be true....about reality anyway!
and thank you.....Jean Pineda Quimpo...who commented on my FB page "Hope we can get some tutorials on your piece."
Have fun shooting and using your iPhone for creative endeavors! Hope to see some of you on an iPhone or Big Camera workshop one day! or find me on FB!

Wednesday, January 21, 2015

National Police Memorial ~ App Stacking: Snow Daze ~ Stackables


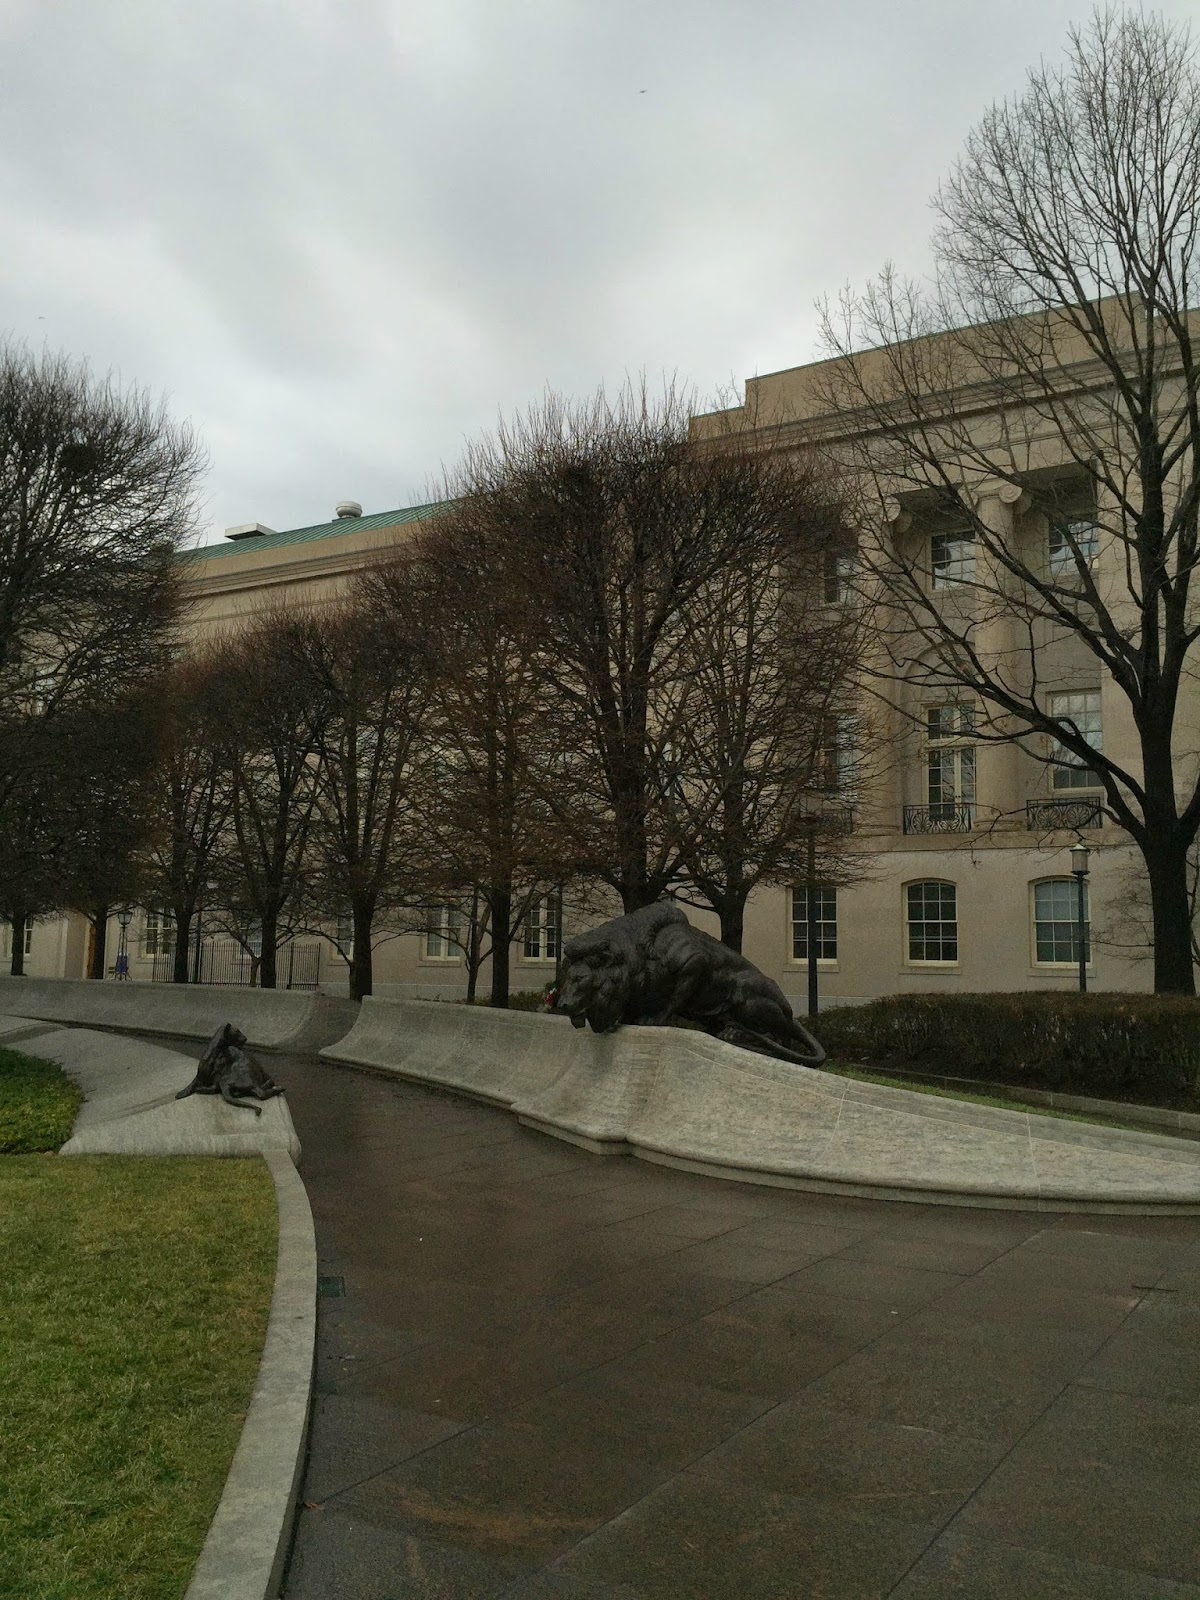
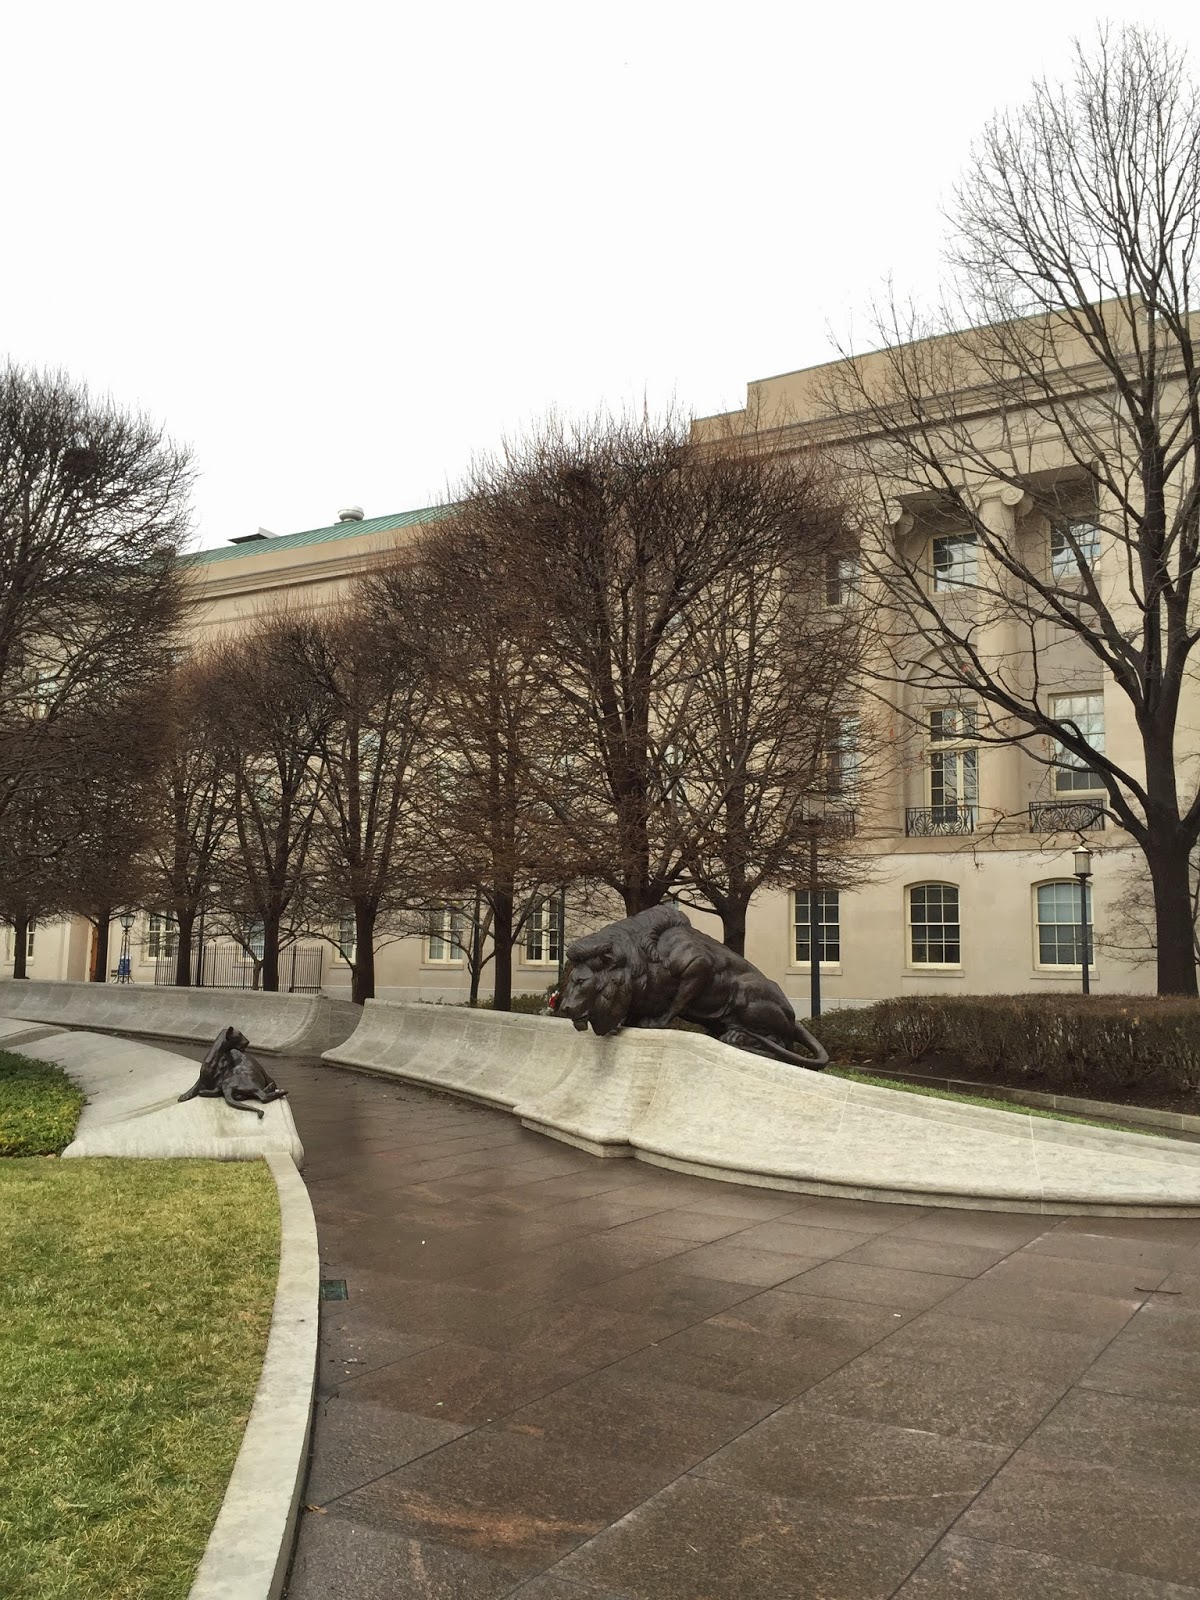
Seems fitting since it is snowing that I make this post on Snow Daze by JixiPix and Stackables by Samer Azzam, for processing a couple images I made in Washington, DC at the National Police Memorial. The image above was captured using BracketMode by CogiTap Software, delivering two exposures to the camera roll, one light for the dark areas in the scene and one dark for the bright areas in the scene.
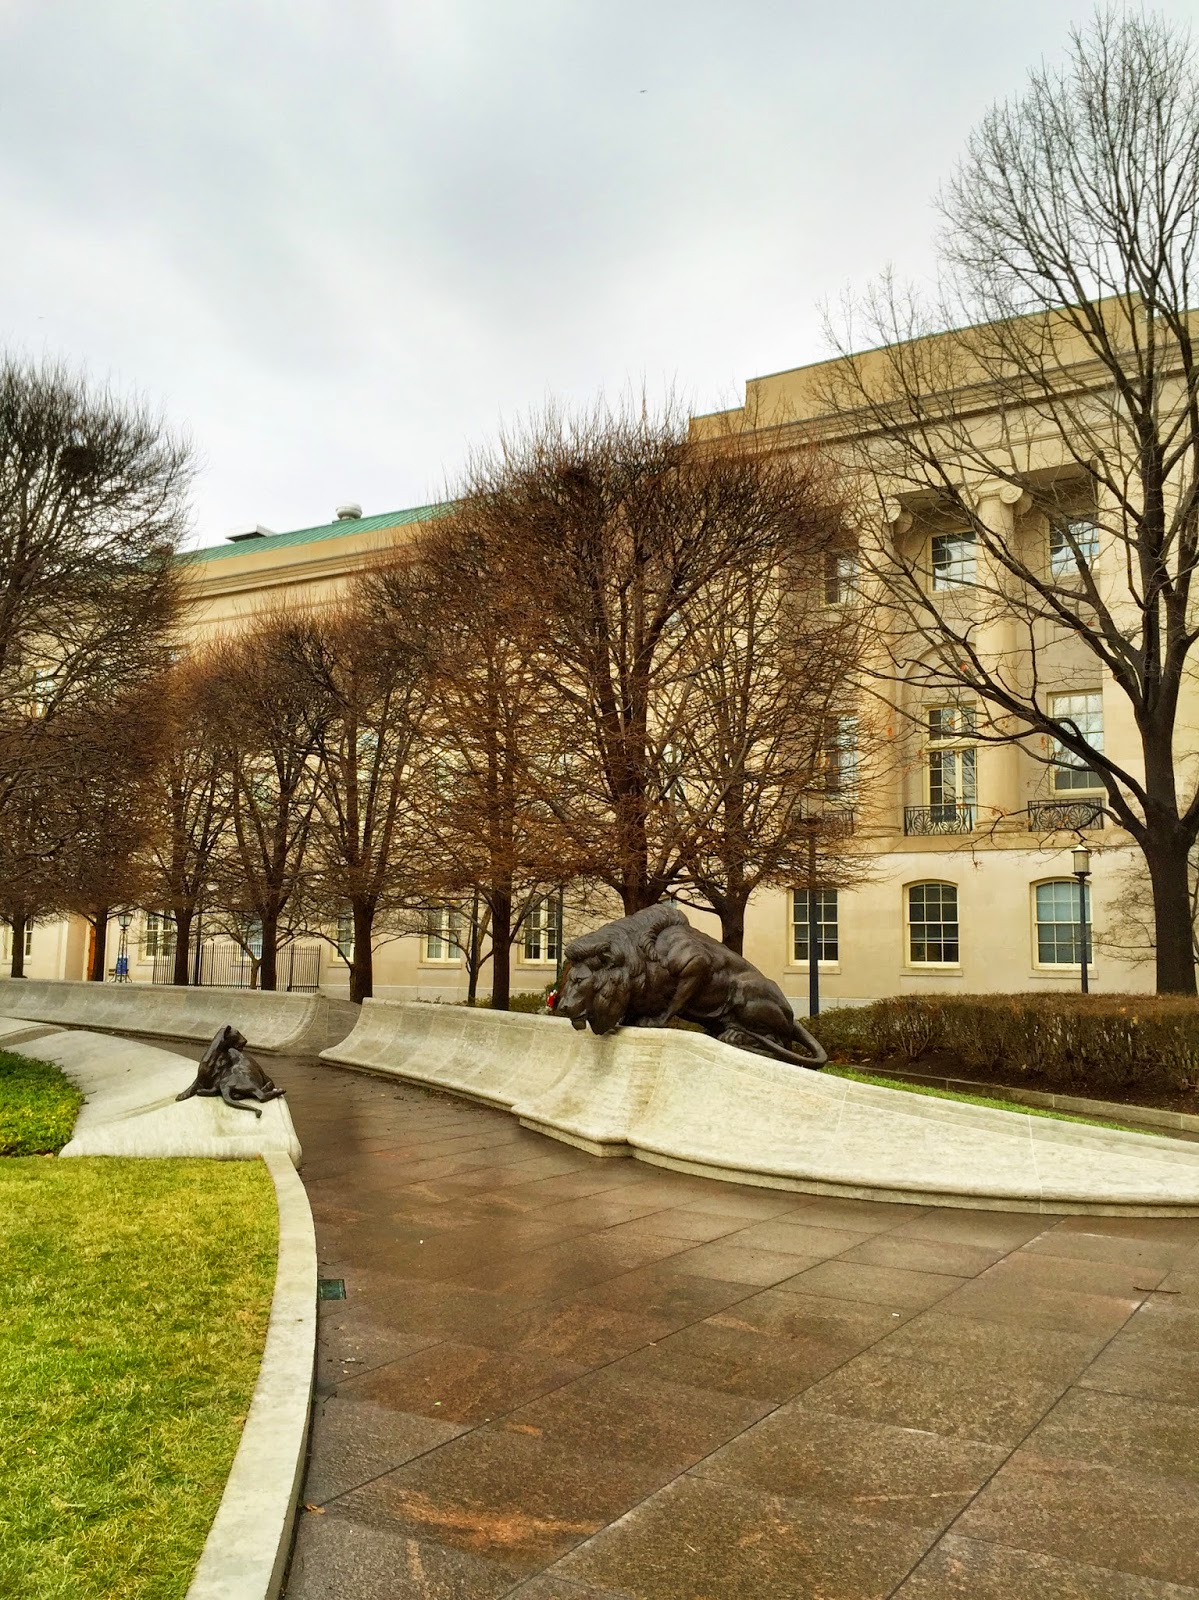
Bracket Mode capture image for bright sky
Bracket Mode capture for dark shadows
The two images captured by Bracket Mode were blended in Pro HDR by eyeApps LLC selecting the Actions: HDR from Library menu option, to achieve one exposure, then adjusted for tone and color and saved to camera roll.
Combined Bracket Mode exposures in Pro Hdr
Then I imported the blended image into the app Stackables and applied one layer of adjustment called Bleached in Blend mode "Color" which rendered the image into a monochrome file. I saved that image to the camera roll.
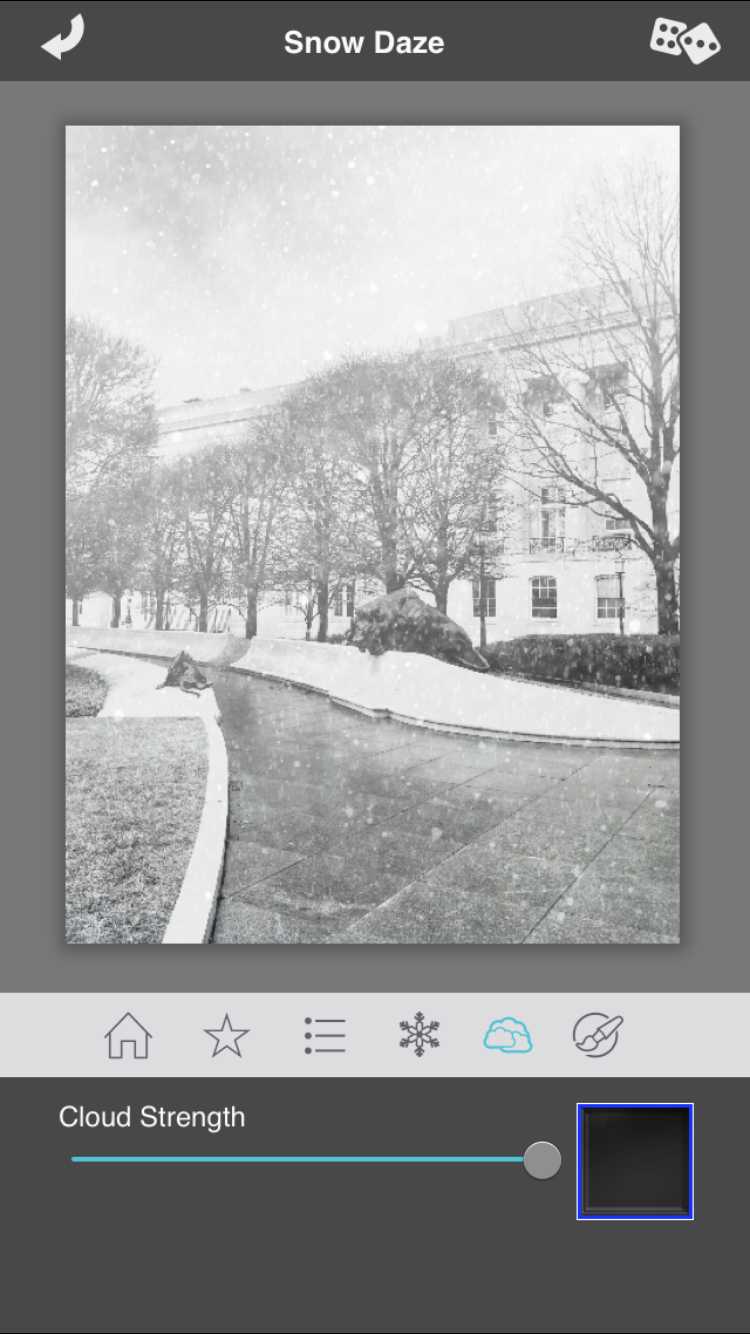
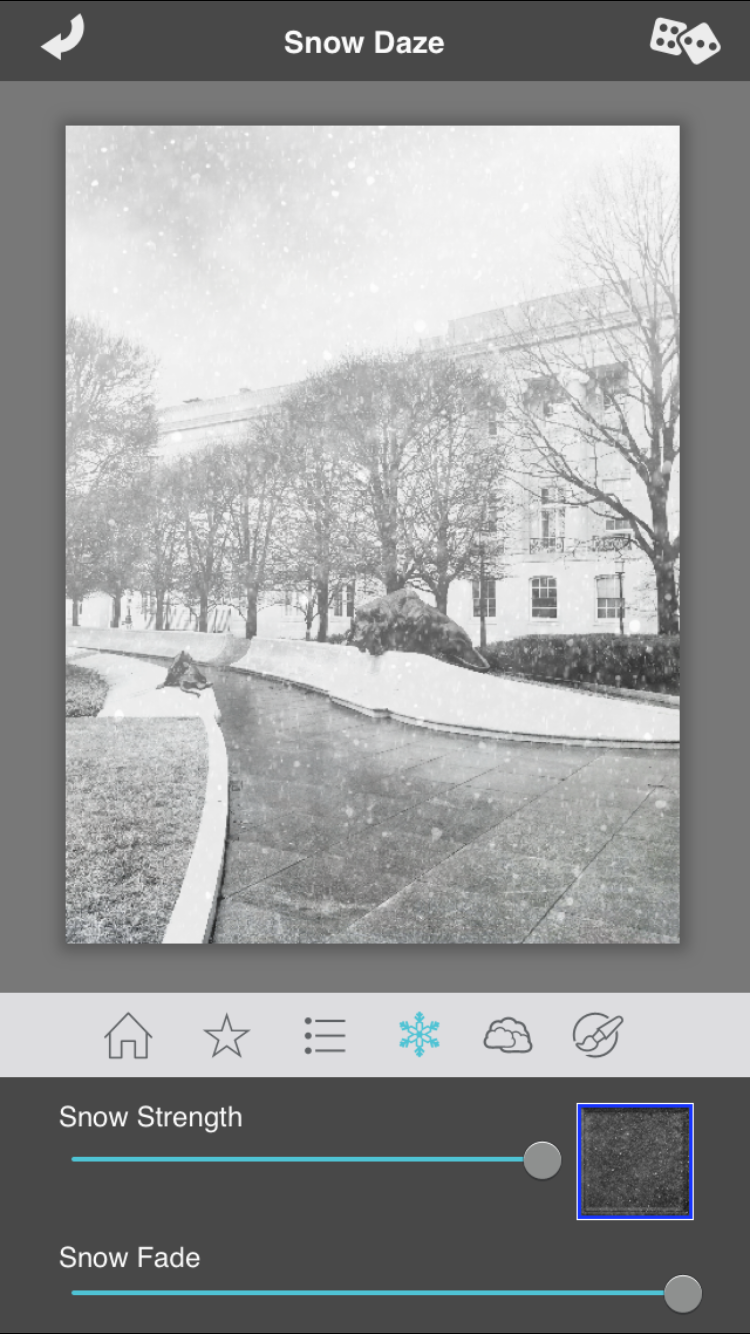
 Then I opened that image in Snow Daze by JixiPix and applied both a cloud filter and a snow filter, making adjustments to each until I achieved my desired look.
Cloud strength adjustment menu choice
Snow adjusted image menu choice
Once I had the look I wanted in Snow Daze I saved that image and then imported that image into Stackables to finish it off.
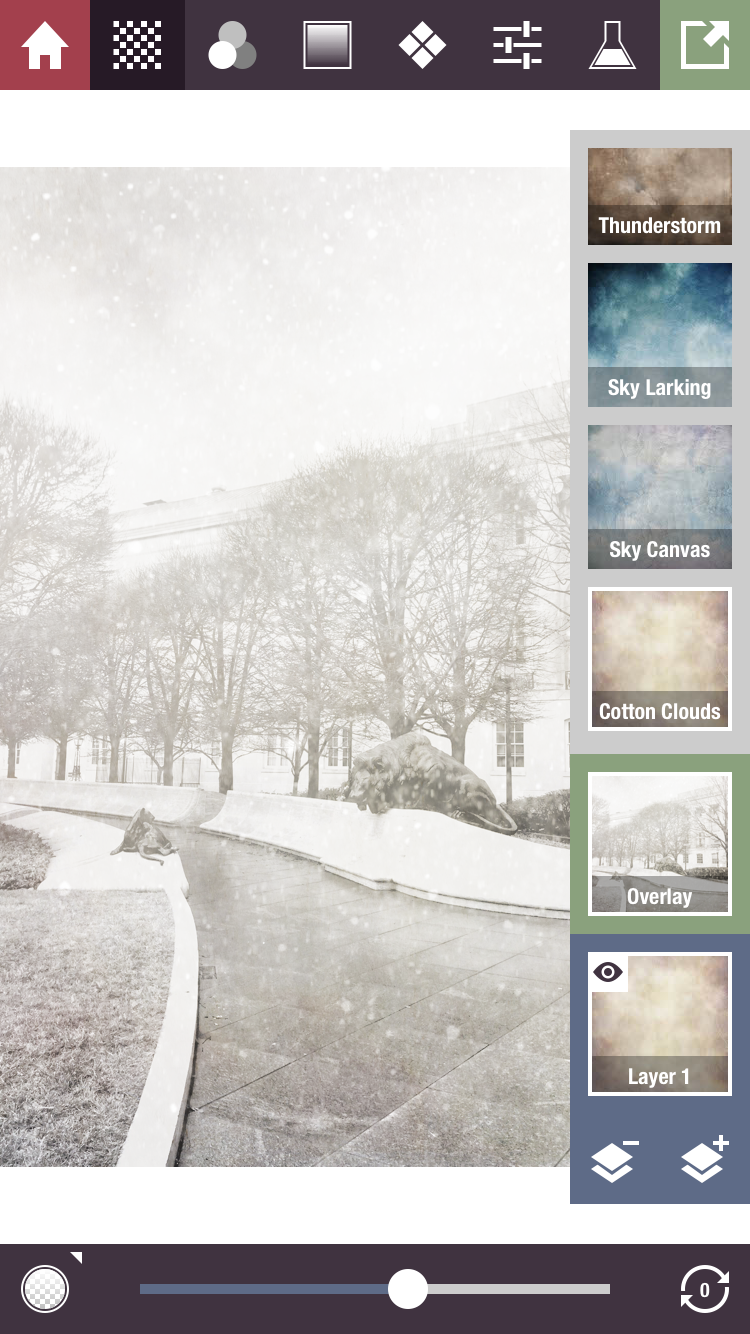
First layer in Stackables: Filter Cotton Clouds:  Blend Mode: Overlay Opacity: about 50% Then hit the + icon to add another layer
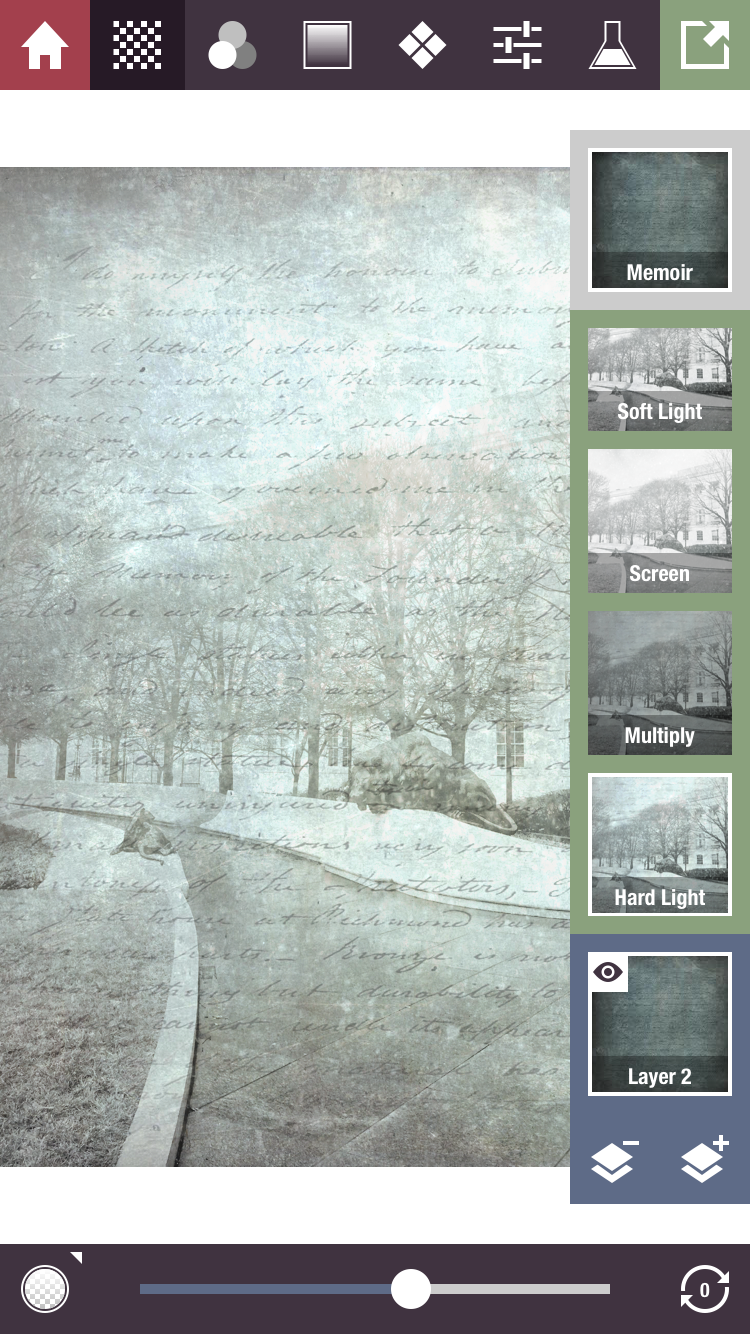
Second layer in Stackables: Filter Memoir (in app purchase) Blend Mode: Hard Light Opacity: about 55% then I added one more layer by hitting the + icon.

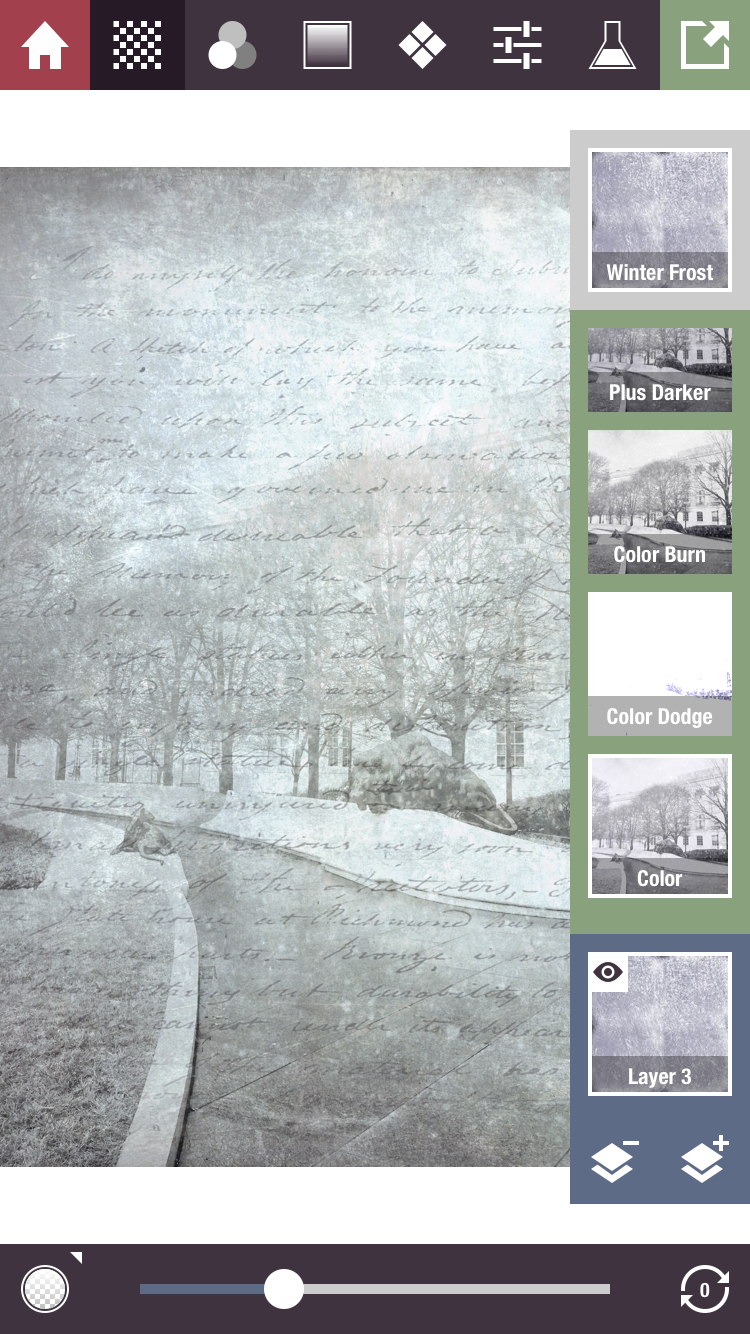
Third layer in Stackables: Filter Winter Frost: Blend Mode: Color Opacity: about 30%
 Thats it...here is one more image I made in a similar process and added a frame effect in PhotoToaster. If you like working with apps on your iPhone, I would love to see you in one of my iPhone workshops sponsored by Capital Photography Center.
Here is a link to my iPhone workshops sponsored by Capital Photograph Center. iPhone workshops Click here.
You can also catch me at The Horizon Photography Summit for a one hour intro to iPhone imagery. Click here.
Or Join me for a six week session in iPhone photography at Johns Hopkins Homewood Campus. For Johns Hopkins info Click here.