Sunday, December 13, 2015

Gifts for your favorite iPhone Photographer

Vermont Fall
Captured using Camera+, processed in Snapseed, artistic filter applied in Photocopier.
 Its winter, but it feels like spring! Some of the azaleas in the garden have lone blossoms and the hellebore plants are putting out new shoots.

But it is the season of giving and I was asked by Marie of Capital Photography Center, to put together a list of some of my favorite iPhone gift ideas. I thought I would share it with you here. All of the items on this list I use and enjoy!
So if you have an iPhone photographer in the house I hope you will gift them a small item from this list.


Here are TEN GREAT GIFT ideas.

1. An iTunes Gift Card is tops for buying more photo apps!
What’s better than an iTunes Gift card for downloading more Apps for photography!

2. Touch sensitive gloves for navigating your iPhone screen in winter.
 Isotoner has a great selection for women here: 
And for men here:

3. A set of awesome lens attachments from INMACUS: Here

4. Nothing is better than Mophie for keeping your iPhone going long after the battery is run out. Mophie has a great selection of cases and external battery packs here:

5. Reusable wire wraps to keep your cords from snarling make great stocking stuffers!

6. For your Vera Bradley fan a cross body iPhone case is awesome! I love mine!

7. What’s better than a subscription to iPhone Life Magazine!

8. If your iPhone Photographer is also an audiophile Bose makes a super collection of Bluetooth enables speakers that are incredible!

9. A stylus is also a great stocking stuffer gift! I love mine from Pogo! https://tenonedesign.com/pogo.php

10.  A car charger for the road tripper! I love this one from Dell. http://accessories.us.dell.com/sna/productdetail.aspx?c=us&l=en&s=bsd&cs=04&sku=A8582143

Bonus idea....
11. A microfiber lens cleaning cloth is always needed to keep that iPhone lens sharp and clean.

Oh and maybe a workshop with me!

Join me December 20, at Union Station for my Holiday Getting Started in iPhone Photography workshop only four spaces left!

Sunday, November 15, 2015

iPhone Photo Essay? ~ Yes! The pictures tell the story....


It has been a while since I wrote a post but now that summer is over and fall almost gone, I have a few minutes to compose an iPhone blog.
So ~ What is a Photo Essay? Wikipedia says:  A photo essay is a set or series of photographs that are intended to tell a story or evoke a series of emotions in the viewer. OK, so last week I wanted to get in a long walk on the boardwalk in Ocean City, Md. I did not know how far exactly my objective of walking from one end to the other was but it turned out to be four miles. I did not want to carry my big camera gear for an unknown, health walk, so I took my iPhone and restricted myself to shooting with the INMACUS Wide Angle attachment and Camera+ only. I do this sometimes with my big camera forcing  myself to "see" only through one fixed focal length lens and make images. It is a great exercise in creativity. 

As I began my walk it was obvious to me that the story I would tell through the images I made that day was one of a resort town after the season. As I walked I poked the lens of the iPhone through wrought iron bars that restricted access to pool areas closed for the season. I could never have done that with my big camera, I was able to get shots because of the lens attachment and the size of my iPhone. The pool series evolved:


As I walked on the boardwalk I saw other images that spoke to the idea of a closed summer resort town, such as the empty restaurant seating and shuttered storefronts.


Further on the boardwalk there were more signs of a past summer season.
All the images here were processed with Snapseed and converted to monchrome in Snapseed.

 Broken signs, empty signs, became a series...


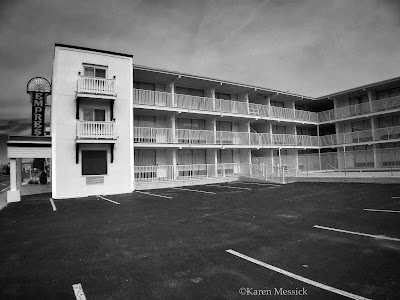
The normally crowded boardwalk  had the infrequent bicyclist or kids on skateboards and the usually crowded to overflowing parking lots of the old motels were absolutely empty.


And so until next year when the crowds, the summer sun, and I return the resort town will look like this.

NEWS........

Next summer I will be presenting on iPhone Photography at the NECC Conference in Amherst, Mass.  July Friday 15, Saturday 16, and Sunday 17. If you live in the area or are a part of the Council, I hope to see you there. 


Wednesday, August 26, 2015

Shooting with the INMACUS Wide Angle lens ~ Camera+


Capture: Camera+ iP6 fitted with INMACUS 18mm HD lens
Processed: Vintage Scene

Recently I received a couple products in the mail from the folks at INMACUS.com to work with on my iPhone 6.  Yesterday I had a chance to open the package on the 18mm HD Wide Angle kit and have some iPhone photography fun while also getting in my daily objective of 10,000 steps. So I went out to a local park with great trails and barns nearby in the Cromwell Valley.

The images below are straight out of the iPhone..no processing for purposes of evaluation.
My thoughts on the lens: I loved it! For $59.90 US I think its a great addition to any iPhone photographers accessories!
It comes in a package with a small lens cap, a circular polarizing filter which works with the standard iPhone lens fitted with the "Rapid Grip Adapter", and an HD Closeup which I did not try out yesterday...as I continue to work with each filter I will add a post for my results.
This lens was as sharp to my eyes as the iPhone without any lens adapters edge to edge! I was amazed at that! I did detect a very small amount of vignetting, which is no surprise with an attachment and a wider angle. It was so small that it did not bother me because it can easily be fixed in post with either Touch Retouch or the new Spot repair in Snapseed......and it could have been because I had not seated the attachment exactly. It does clip over the iPhone easily and seats well over the original iPhone lens.
So here are a few images to compare with and without the HD 18mm attachment. For all the images I stood in the same spot and made two shots one with the native lens and one with the wide angle attachment as noted. I enjoyed some of the close up distortion with the wide angle as well as the ability to get more in the frame. Sometimes you just can't back up far enough using the native lens and this solves that problem as in the image of the tree.
Straight shot native iP6 lens Camera+ for capture
Straight shot iP6 lens with INMACUS 18mm HD wide angle attachment Camera+ for capture
Straight shot native iP6 lens Camera+ for capture

Straight shot iP6 lens with INMACUS 18mm HD wide angle attachment Camera+ for capture 
Straight shot native iP6 lens Camera+ for capture

Straight shot iP6 lens with INMACUS 18mm HD wide angle attachment Camera+ for capture 
Straight shot native iP6 lens Camera+ for capture

Straight shot iP6 lens with INMACUS 18mm HD wide angle attachment Camera+ for capture
Straight shot native iP6 lens Camera+ for capture


Monday, August 24, 2015

Shooting the Sunrise: Apps: Camera+ ~ Photo Fx ~ Snapseed

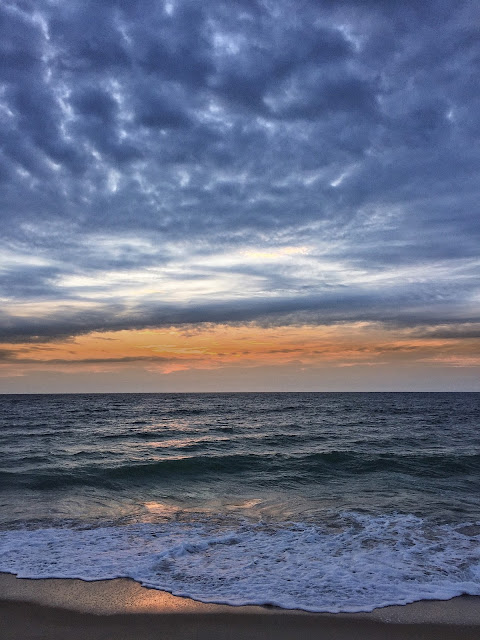
Final Processed Image
I love standing at the edge of the ocean before sunrise and on my last day at the beach this August I did just that before packing up and heading out. It was a short week and I did not even take my big camera, but as the sun began to rise I could not help but capture a few images with my iPhone, it was a beautiful morning. Today I had a few minutes to share my steps on the capture and processing the image I made that morning.

Capture: I am an avid Camera+ user when I want a clean file to work with, one that is closest to the kind of file I might get from shooting with my DSLR. (No pre-applied filters just a straight shot.) The really big advantage for me using Camera+ is the ability to choose and lock focus and choose and lock exposure. I chose the exposure I wanted by moving the exposure reticle around the screen until I saw the exposure I liked then locked it while I locked my focus as well, then all you have to do is keep firing the shutter button. I made the exposure to capture detail in the sea, knowing the area just above the horizon would blow out and I could YES, Fix it in Post!
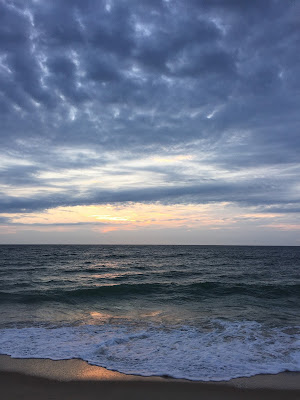
Image 1: Original Capture
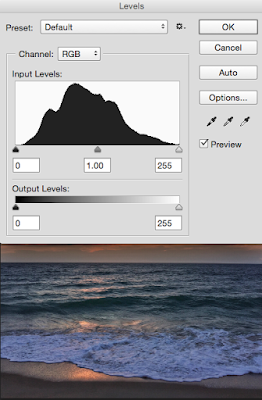
Image 2: Original with Levels (in PS) showing blow out in highlights just to demonstrate  my thoughts and for purposes of  confirming my capture. (Note: Non of the processing of this image was done in PS)

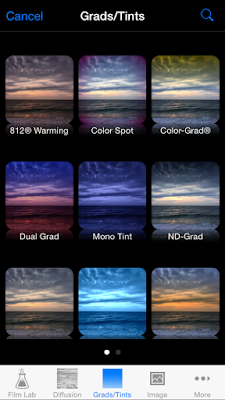
Processing: Photo FX by Tiffen is one of my favorite landscape processing apps because of the Grad Filters.
Image 3: Access the main "Grad Menu" by tapping on the Grads/Tints icon,
 then tap on the bottom right image to open the Strip Grad menu.
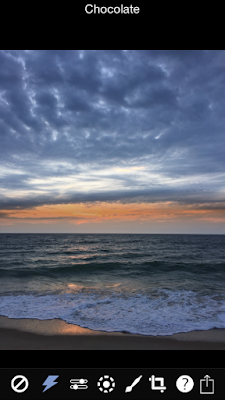
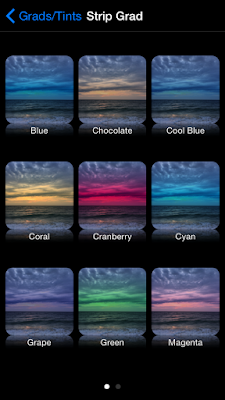
Image 4: Once in the strip grad menu there are sub menus of colors.
I used the Chocolate strip grad by tapping on the icon image identified as chocolate.
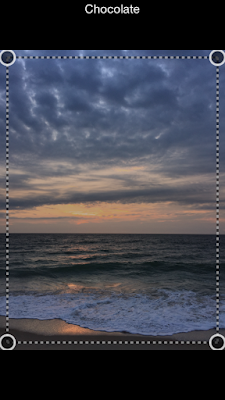
Image 5: When you tap on the chocolate strip grad icon this screen appears.  As you can see the filter has been applied over the entire image. But I only wanted the effect on the bright area just above the horizon. By tapping on the dashed circle icon at the bottom of the menu screen a new option appears on the screen.
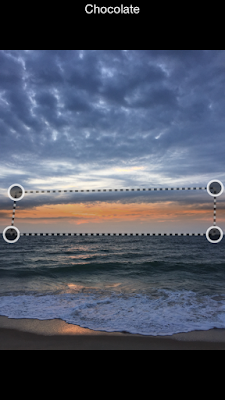
Image 6: By dragging the shaded gray circles on the screen at the top and bottom
of the image you can reposition the strip grad filter.
Image 7: Grad strip filter adjusted to area desired.
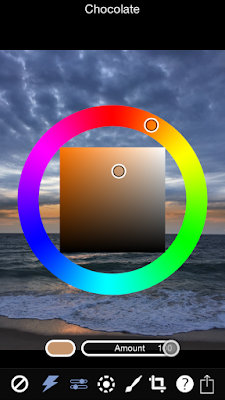
Image 8: In addition to adjusting the placement of the grad strip you can also adjust the color and opacity of the grad by tapping on the blue adjustment icons to the immediate left of the dashed circle icon. When you tap on that it brings up a color picker. By moving the circles around on the two color graphs you can choose the color you want.
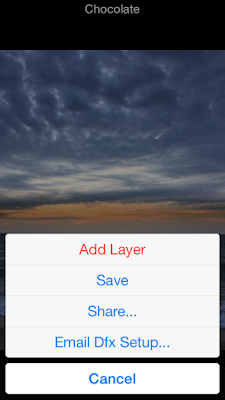
Image 9: When its time to save your adjustments you can tap on the lower right save icon in image 8 and either add these adjustments as a layer and proceed with further adjustments by choosing add layer or you can save to camera roll. I save the adjusted image to my camera roll for further processing in Snapseed.
Image 10: Further processing in Snapseed, using Tonal Contrast: Ambience, Saturation, Warmth, Details and Structure. 
Image 11: Final Processed image

Image 12: Histogram in PS of final image showing detail and color now in the bright areas above the horizon.

Friday, May 22, 2015

Barcelona Street Photography ~ Hipstamatic ~ Snapseed ~ Diptic ~ Phonto

Street Tango
Barcelona is a fabulous city filled with opportunity for street photography!
I chose to capture nearly 95% of my street images with Hipstamatic, using the Film Rasputin and Lens Sergio. I love shooting with the Hipstamatic large screen feature engaged so all I have to do is tap the screen to release the shutter. I also like to turn the sound off so as not to attract attention.
There are several places on the web I like to check out for Hipstamatic info and get combination ideas: one is a blog called Hipstography and the other is the Hipstamatic official blog.

The image above was further processed in Snapseed to make the monochrome conversion. When street shooting it is a good idea to make a series of images all processed with consistency.
When shooting, use the same film lens combo and when processing, make note of the adjustments so they can be applied consistently to create a series of images as in the collage below.
This collage was made using DipTic and Phonto for the script. When using DipTic to make a collage with square images, modify the Aspect adjustment feature to 4:4 and choose a border that works well with the image colors and modify the border size to compliment the collage.

I also made a small book on Blurb using all monochrome images...the link can be found below.
I used Lightroom as the interface with Blurb and it worked well.