 |
| Final Processed Image |
I love standing at the edge of the ocean before sunrise and on my last day at the beach this August I did just that before packing up and heading out. It was a short week and I did not even take my big camera, but as the sun began to rise I could not help but capture a few images with my iPhone, it was a beautiful morning. Today I had a few minutes to share my steps on the capture and processing the image I made that morning.
Capture: I am an avid Camera+ user when I want a clean file to work with, one that is closest to the kind of file I might get from shooting with my DSLR. (No pre-applied filters just a straight shot.) The really big advantage for me using Camera+ is the ability to choose and lock focus and choose and lock exposure. I chose the exposure I wanted by moving the exposure reticle around the screen until I saw the exposure I liked then locked it while I locked my focus as well, then all you have to do is keep firing the shutter button. I made the exposure to capture detail in the sea, knowing the area just above the horizon would blow out and I could YES, Fix it in Post!
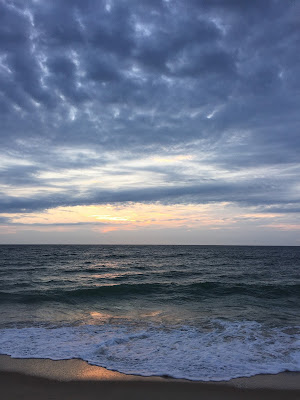 |
Image 1: Original Capture
|
 |
| Image 2: Original with Levels (in PS) showing blow out in highlights just to demonstrate my thoughts and for purposes of confirming my capture. (Note: Non of the processing of this image was done in PS) |
Processing: Photo FX by Tiffen is one of my favorite landscape processing apps because of the Grad Filters.
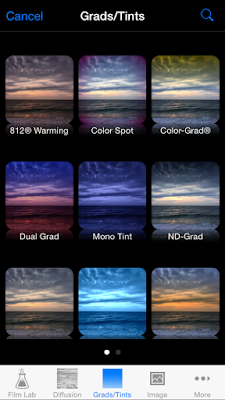 |
Image 3: Access the main "Grad Menu" by tapping on the Grads/Tints icon,
then tap on the bottom right image to open the Strip Grad menu. |
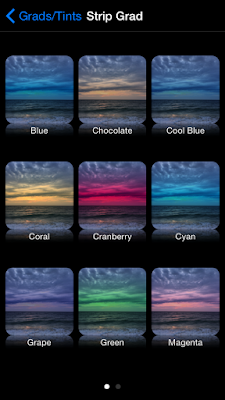 |
Image 4: Once in the strip grad menu there are sub menus of colors.
I used the Chocolate strip grad by tapping on the icon image identified as chocolate. |
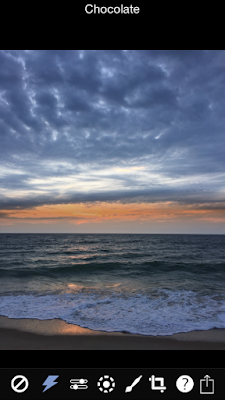 |
| Image 5: When you tap on the chocolate strip grad icon this screen appears. As you can see the filter has been applied over the entire image. But I only wanted the effect on the bright area just above the horizon. By tapping on the dashed circle icon at the bottom of the menu screen a new option appears on the screen. |
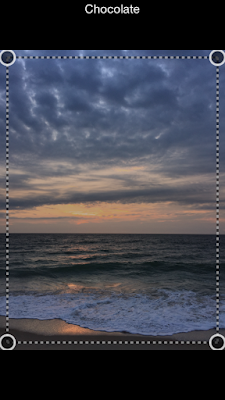 |
Image 6: By dragging the shaded gray circles on the screen at the top and bottom
of the image you can reposition the strip grad filter. |
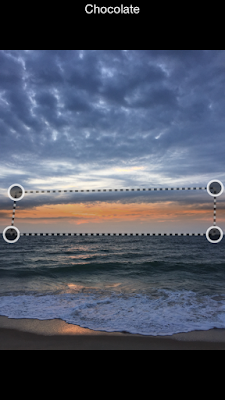 |
| Image 7: Grad strip filter adjusted to area desired. |
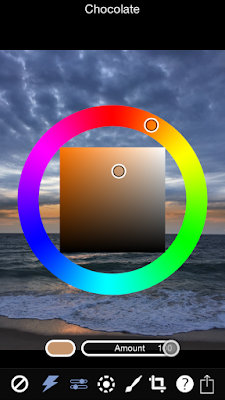 |
| Image 8: In addition to adjusting the placement of the grad strip you can also adjust the color and opacity of the grad by tapping on the blue adjustment icons to the immediate left of the dashed circle icon. When you tap on that it brings up a color picker. By moving the circles around on the two color graphs you can choose the color you want. |
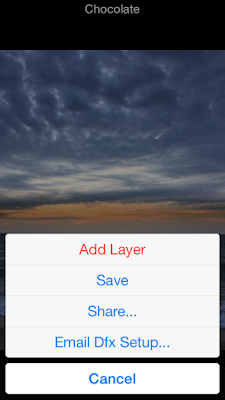 |
| Image 9: When its time to save your adjustments you can tap on the lower right save icon in image 8 and either add these adjustments as a layer and proceed with further adjustments by choosing add layer or you can save to camera roll. I save the adjusted image to my camera roll for further processing in Snapseed. |
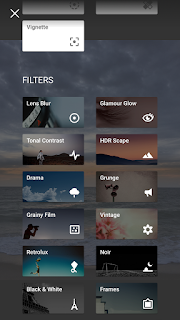 |
| Image 10: Further processing in Snapseed, using Tonal Contrast: Ambience, Saturation, Warmth, Details and Structure. |
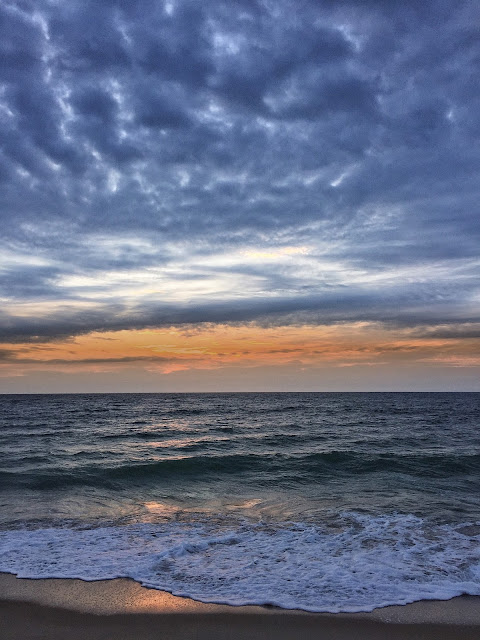 |
| Image 11: Final Processed image |
 |
| Image 12: Histogram in PS of final image showing detail and color now in the bright areas above the horizon. |


No comments:
Post a Comment