 |
| This is a BracketMode shot for the highlights made on a tripod |
 |
| This is the BracketMode shot for the dark areas of the image. |
After making the initial shots above in BracketMode, I blended the two images in TrueHDR, adjusting warmth, brightness and saturation, and arrived at the image below.
Then I decided I wanted the image in Black and White so I used the app Simply Black and white to make the conversion, adding a subtle black vignette and applying an orange filter option, arrived at the image below.
I wanted a slightly different toning to the gates and opened the image in Bleach Bypass and selected the tone option Verve adjusting the slider until I had the tone I wanted below.
Then I was goofing around with this last image and said I wonder what this would look like run through Tiny Planet...so I did...and came up with these two images.
Then I said hmm...what can I do to these that might be cool? And I opened the last one in BadCamera added a frame and some effects and came up with this image.
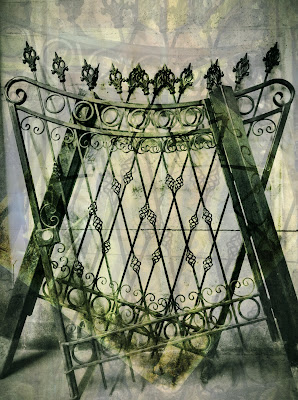
Now that I had this image from Tiny Planet, I said..how can I blend these together??? So I opened SuperImpose...and used the "Verve" gates file as the background image...and added the BadCamera file above as the top image, transforming the top image by shrinking the file and rotating it 45 degrees to the right then adding a yellowish color to the foreground rotated image, adjusting for exposure, brightness and saturation. Then while in SuperImpose I added one more foreground image of the gate and stretched it out over the last two files after reducing the opacity to cover the barren area of the bricks and the foreground.
My next step while in SuperImpose was to add a file I shot of a stained glass window to these layers stretching out the file and reducing the opacity leaving only a trace of this file.
After saving the layered file from SuperImpose, I opened that file in Simply HDR and chose a High Dynamic range preset tab "SubtleHDR", committed that render and then tapped the adjust tab while still in SimplyHDR, and chose a tint option containing purple and reduced the opacity to get the enhanced color effect in the image.
Then I ran that image into PerfectPhoto sharpened and then into SnapSeed for the ragged edge border below and lastly ran that image into Crop'n'Frame to finish it off. Now you know how my mind works! At least on this shot...
The final resolution on the file is 1400 x 1809, so it lost some file size going through these iterations. The original file size was 2592 x 1936.


Thx much, K. Fabulous!
ReplyDeleteFun to see exactly how the creative mind works!
ReplyDeleteThanks Tony and Sue for your comments!
ReplyDeleteMost enlightening Karen! Wonderful result.
ReplyDeleteThanks Donnie for commenting! I appreciate it.
ReplyDelete